OpenTherm Adapter
Posted on Monday, April 2, 2018 at 12:00 AM, 161769 views

OpenTherm Adapter is minimized version of Arduino Controller and its compatible with 5V and 3.3V controllers like Arduino, ESP8266 or Raspberry Pi. OpenTherm Adapter allows you to control your boiler using your favorite controller via OpenTherm protocol which is implemented in OpenTherm Library. It is good for making your custom thermostat or for boiler remote control. Also OpenTherm thermostat can increase boiler efficiency comparing to usual on/off thermostat.
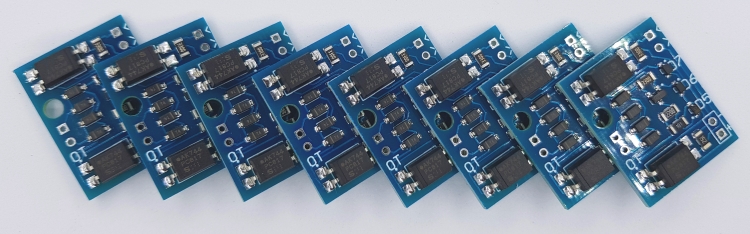
Assembled OpenTherm Adapter:
To Buy Assembled OpenTherm Adapter please navigate to the Shop page or buy it here:
Arduino Connection:
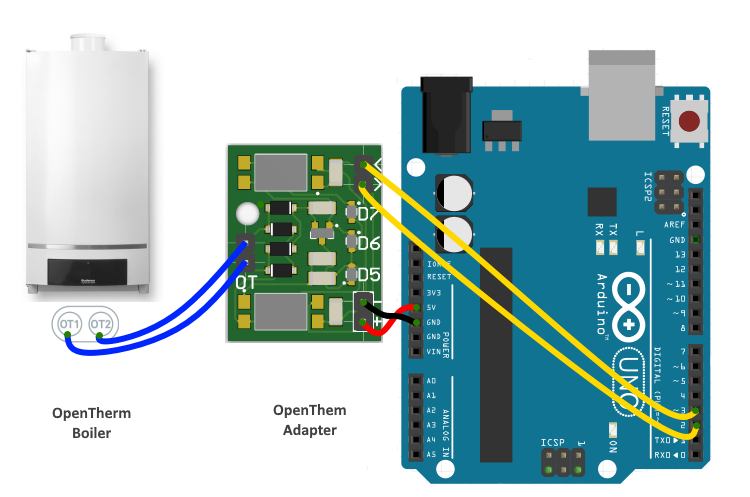
- OT1/OT2 - two wires connected to boiler regardless of polarity instead of usual thermostat
- VCC(+) to Arduino 5V, GND(-) to Arduino GND
- IN(<) to GPIO3, OUT(>) to GPIO2
OpenTherm Adapter output pin should be connected to Arduino input pin and adapter input pin to Arduino output pin. Any digital pin can be configured as controller output pin, but controller input pin should support interrupts. Arduino digital pins usable for interrupts: Uno, Nano, Mini: 2,3; Mega: 2, 3, 18, 19, 20, 21
ESP8266 WeMos D1 Mini Connection:
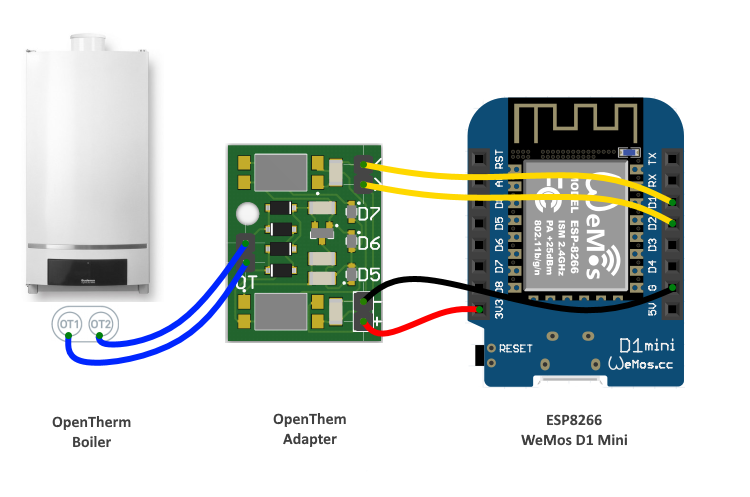
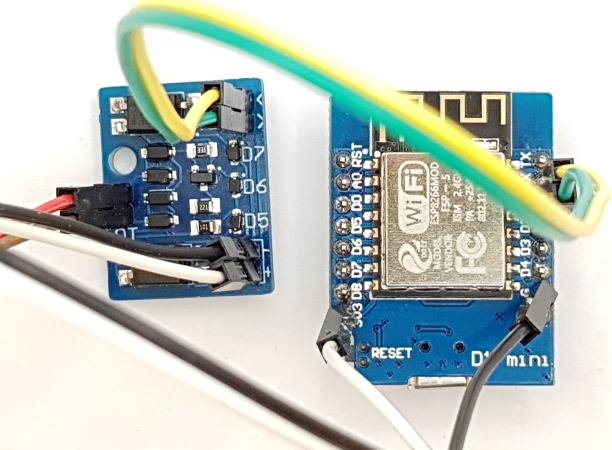
- OT1/OT2 - two wires connected to boiler regardless of polarity instead of usual thermostat
- VCC(+) to ESP8266 3.3V, GND(-) to ESP8266 GND
- IN(<) to GPIO3, OUT(>) to GPIO2
OpenTherm Adapter output pin should be connected to ESP8266 input pin and adapter input pin to ESP8266 output pin. Any digital pin can be configured as controller output pin, but controller input pin should support interrupts. ESP8266: Interrupts may be attached to any GPIO pin except GPIO16, but since GPIO6-GPIO11 are typically used to interface with the flash memory ICs on most esp8266 modules, applying interrupts to these pins are likely to cause problems
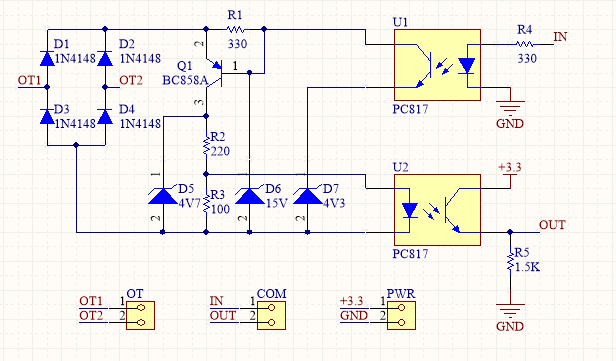
Schematic and PCB:
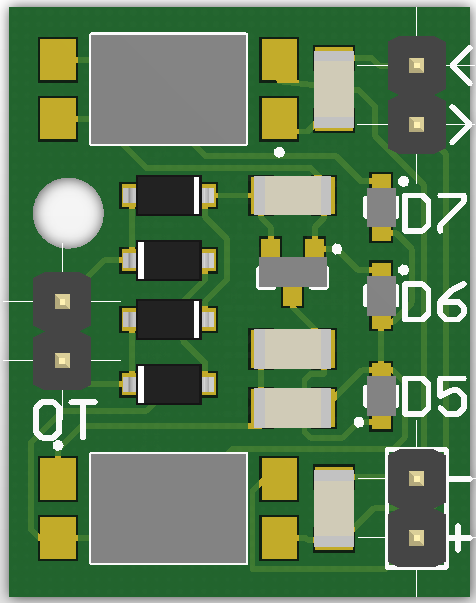
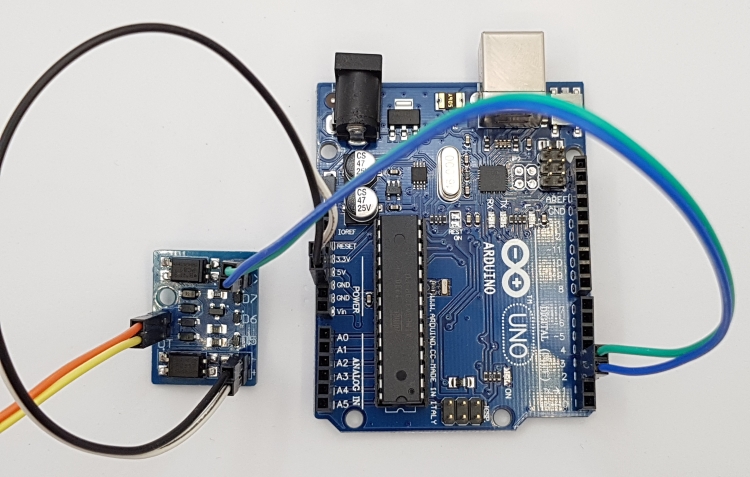
Assembled OpenTherm Adapter:

Hardware:
- Opto-coupler PC817 x 2 0.2$
- BC858A PNP Transistor 0.1$
- Diode 1N4148 x 4 0.1$
- Zener Diode 4V7 0.1$
- Zener Diode 15V 0.1$
- Zener Diode 4V3 0.1$
- 1/4 Watt 5% Resistor 100 Ohm 0.01$
- 1/4 Watt 5% Resistor 220 Ohm 0.01$
- 1/4 Watt 5% Resistor 330 Ohm x 2 0.01$
- 1/4 Watt 5% Resistor 1k5 Ohm 0.01$
- Arduino UNO or any Arduino Compatible 2-7$
Software:
Sample Code:
#include <Arduino.h>
#include <OpenTherm.h>

const int inPin = 2;
const int outPin = 3;
OpenTherm ot(inPin, outPin);

void ICACHE_RAM_ATTR handleInterrupt() {
	ot.handleInterrupt();
}

void setup()
{
	Serial.begin(115200);
	Serial.println("Start");

	ot.begin(handleInterrupt);
}

void loop()
{
	//Set/Get Boiler Status
	bool enableCentralHeating = true;
	bool enableHotWater = true;
	bool enableCooling = false;
	unsigned long response = ot.setBoilerStatus(enableCentralHeating, enableHotWater, enableCooling);
	Serial.println("Central Heating: " + String(ot.isCentralHeatingActive(response) ? "on" : "off"));
	Serial.println("Hot Water: " + String(ot.isHotWaterActive(response) ? "on" : "off"));
	Serial.println("Flame: " + String(ot.isFlameOn(response) ? "on" : "off"));

	//Set Boiler Temperature to 64 degrees C
	ot.setBoilerTemperature(64);

	//Get Boiler Temperature
	float temperature = ot.getBoilerTemperature();
	Serial.println("Boiler temperature is " + String(temperature) + " degrees C");

	Serial.println();
	delay(1000);
}
To Buy Assembled OpenTherm Adapter please navigate to the Shop page or buy it here: